Getting started
This short guide explains how to get from receiving a fluepdot kit to flipping pixels the first time.
Hardware assembly
Warning
Electrons’n’stuff can be dangerous. Use your brain and a proper 12V power supply rated for at least 3 amperes.
Perform the following steps:
Solder the components J1 (USB port), J2 (10 pins, 2.54mm, power supply, RS485 and select) and J3 (34 pins, flat cable connector) to the board.
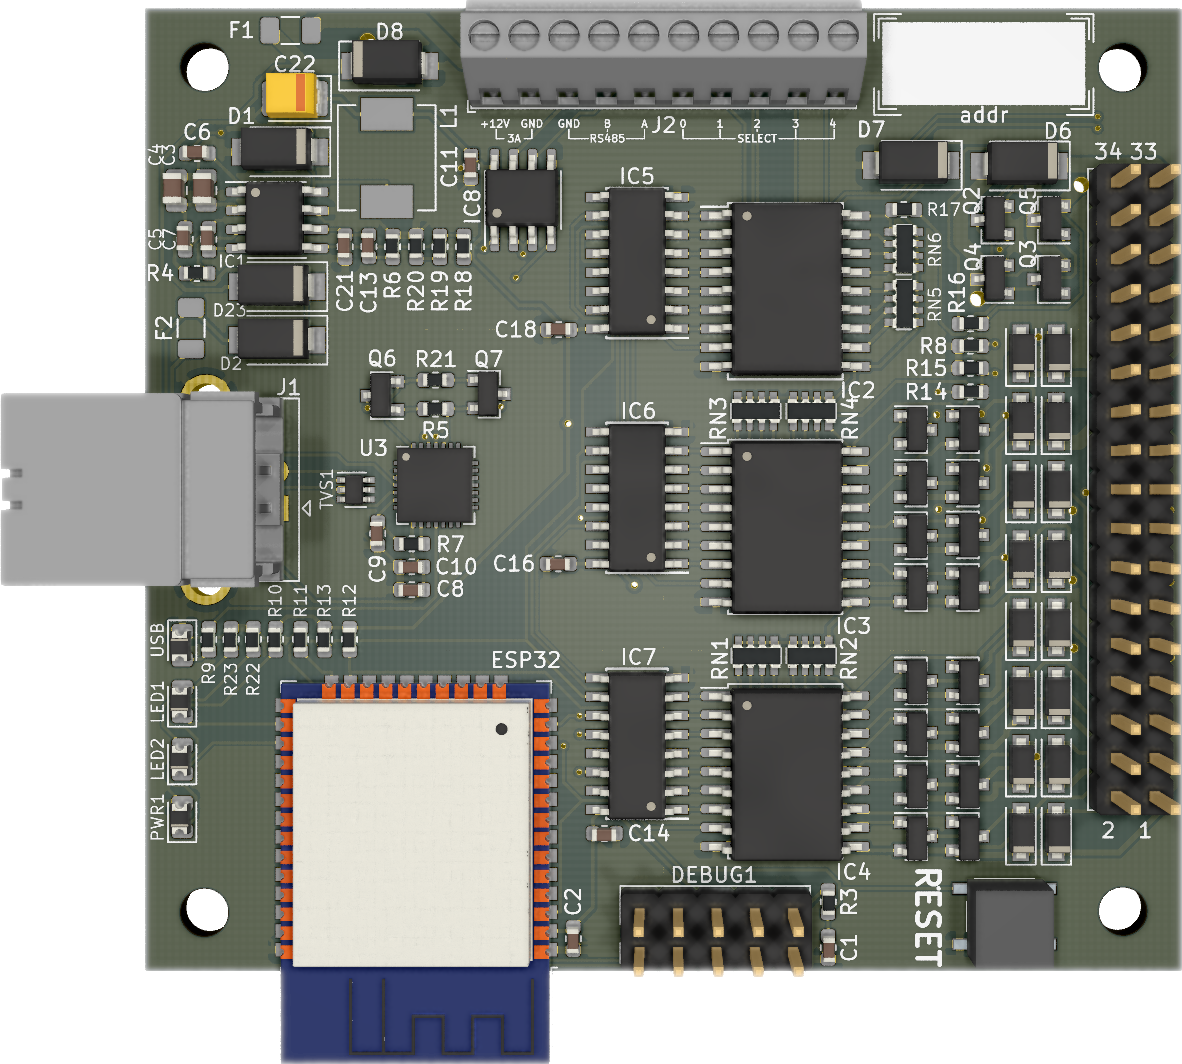
J3 notch must point to the right, to the PCB’s border.
Attach the flatband cable to the boards and the fluepboard.
Connect the panel’s select pins to the PCB. Pinout is given in the rendering. The order is left (0) to right (5), assuming panel’s “top” is where the very long connector with huge amounts of pins is.
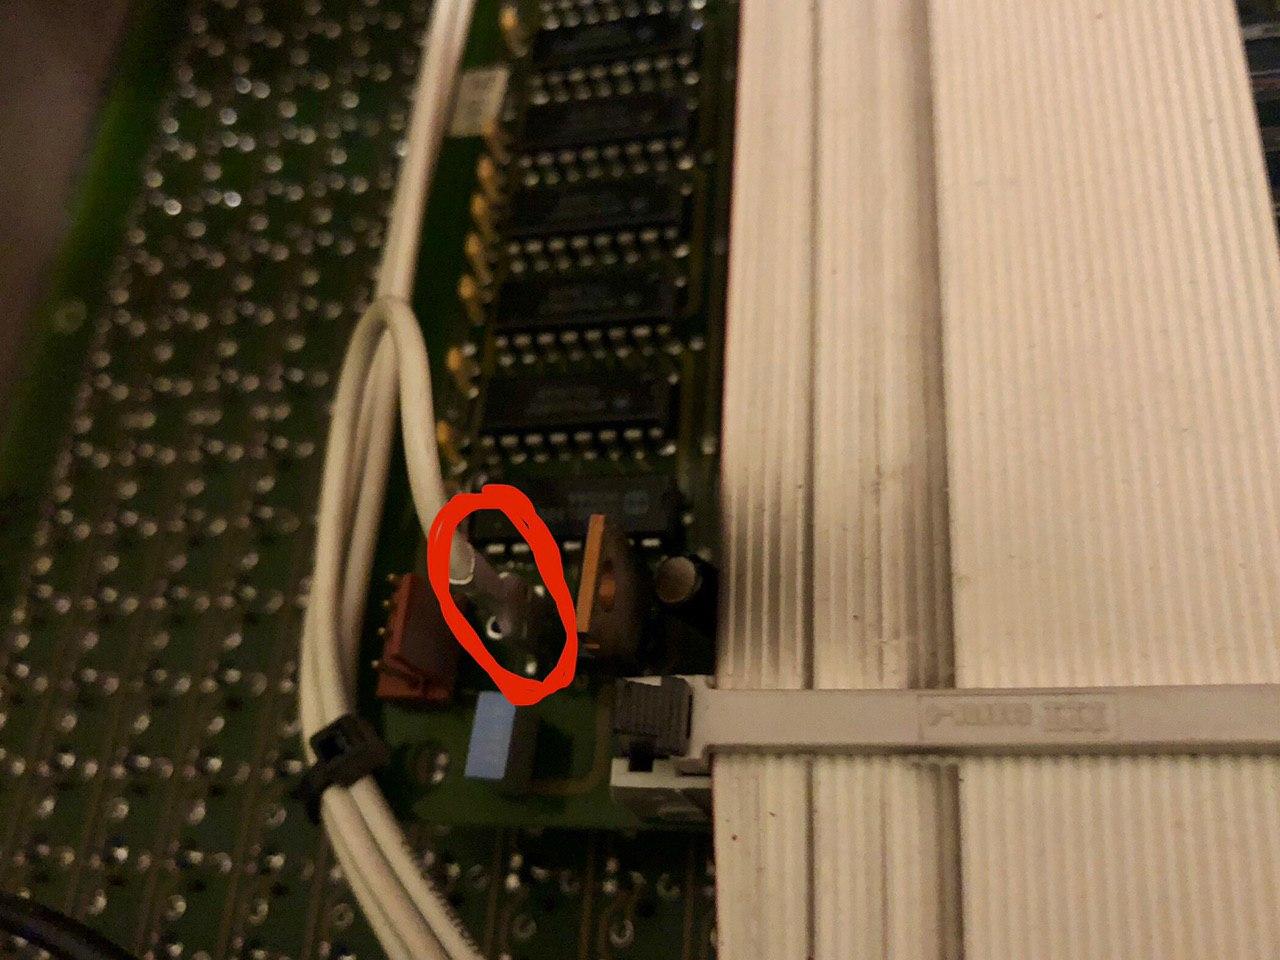
Panel select pin (highlighted)
In case you mess with the panel order, there are CLI commands for changing the order in software.
Provide 12V and at least 3A to the PCB as displayed on the pinout above.
Connect the fluepboard via USB to some computer.
Software
The fluepboard has the USB vendor id 0x1209 and product id 0x4223 assigned by pid.codes.
Please configure your system (e.g. by writing a udev rule) to allow access to the serial port.
USB-to-serial chip in use is a CP2102N. Users of linux based operating systems don’t need to install any drivers.
Note
Serial interface params
Baudrate: 115200
Data Bits: 8
Parity: None
Stop Bits: 1
Connect to the serial interface
screen /dev/ttyUSB0 115200
Configure the fluepdot panel layout
TODO
Optional: Set a hostname
config_hostname yet_another_iot_device.localOptional: Connect to a wireless LAN
config_wifi_station  <ssid> [<password>]
 Configure station mode
       <ssid>  WiFi SSID
   <password>  WiFi Password
Warning
Absolutely no attempt to protect your wireless LAN’s credentials is made. Everyone having access to the fluepboard can retrieve them easily.
The fluepboard’s firmware intentionally does not provide means of authentication. It is up to you as a network operator to restrict access (e.g. by firewalling).
Save the configuration and reboot
config_show
config_save
reboot
Clear and set all pixels as a test, be prepared for noise
flipdot_clear --invert
flipdot_clear